_Page2.jpg)
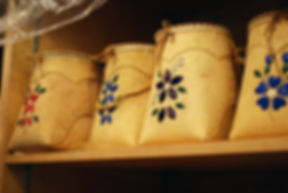
Birchbark Baskets
The women of Fort Liard have been making and using birchbark baskets for centuries.
Painstakingly hand-crafted, today these baskets are considered a work of art and are sought by collectors all over the world.
The History of Birchbark Baskets
For centuries, birchbark baskets were used for storing food, picking berries, storage for sewing and beads, and other carrying needs. They were also used for carrying water and boiling food. Birchbark contains natural waxes that make it waterproof, remarkably rot resistant and flammable. A birchbark container could be made waterproof by sealing the seams with spruce gum.
There were two methods of cooking in birch bark baskets. Often the bark was used as a temporary container made with the brown side of the bark turned outside. Water and food would be put into the basket to hang over the fire. The fire needed to be watched very carefully to ensure that the basket did not flame while the food was cooking. At other times, baskets were buried in the ground, filled with water and very hot rocks were dropped into the water to bring it to a boil. New rocks were continuously added to keep the water cooking the fish or meat. This way the container could be reused. Cooking pots were made by pressing clay mixed with dried grass against the sides and bottom, them dried well.
The Bark
Late spring or early summer, large birch bark trees with few limbs are searched out. Bark has to be harvested while the sap is running to ensure that it is easy to peel. When the moisture is right, a threefood vertical cut is made in the tree and the bark is carefully peeled off around the tree. The brown inner bark is left on the tree so the peeling does not kill it. Sometimes a specially carved piece of wood is used to assist in separating the outer layer from the inner layer. Once the bark is peeled and rooled, it must be stored in a cool place so that the bark will not dry out.
The Roots
White spruce roots is used to sew the basket together. The best time to gather spruce roots is on a rainy day in June, as the bark comes off easier then. Roots are harvested from medium sized trees with very straight and long limbs. Straight roots are easier to split and longroods are better in that the basket maker does not have to stop and add new roots frequently.
Roots with red bark are the best as they are the youngest and strongest. Black roots are too old and will break. The roots are coiled and put into a plastic bag to keep them moist. If they are not to be used immediately, they are dried and moistened again when ready to use.
Making the Basket
Thin branches of red willow are gathered and peeled of bark, then trimmed with a knife to an even dimension. The willow is coiled and soaked in water to be used later, to keep the shape of the basket.
Spruce roots are soaked overnight to make them pliable. Starting with the thick end of the root, a knife is used to begin a split, then half of the root is held in the teeth while the strip is pulled away. The bark is then peeled off and the root split again. The root is cut at any knot as it will dry and break there later anyway. The ends of the roots are sharpened to a point for sewing.
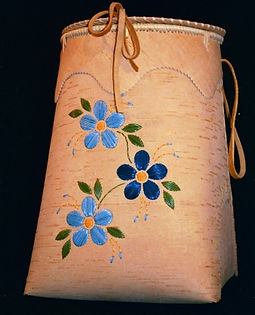
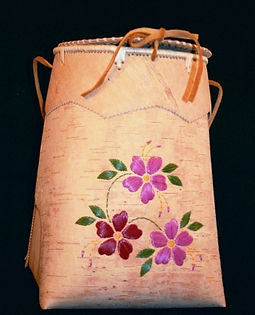
Next, the bark is cut using a pattern to shape the basket. When decorating the basket with quills, a pattern is drawn on the bark, holes punched with an awl, and quills inserted one at a time.
After the design is completed, the bark is dampened with a wet cloth and held over a fire to soften it. A sharp awl is used to poke holes through the bark, and small pieces of wood are inserted to hold the bark together in its new shape until dried. the basket is then braced on the inside with two crossed willow stocks to help the basket keep its form.
A piece of birch bark trim is cut and fitted to the top of the basket. Holes are poked in intervals with an awl. The willow is then measured for the top edge of the basket with the ends tapered to fit together when they are joined.Marks are made where the holes are to be made. Holes are then poked through the two layers of bark, and the sewing begins. The root is laced through, up and over the willow, lashing it to the basket for added strength. The willow stitches are offset, some short, some long, in a pattern to create a design. when the row of stitches is completed, the end of the root is tucked under a stitch and the basket is complete.
Bark-Pattern Biting
The art of bark-pattern biting among the hunting peoples of the Northeast and Eastern Subarctic seems to reach into antiquity.
Historical accounts of the 17th, 18th and 19th century Aboriginals report peeling a paper-thin layer of birch bark, then folding the bark in half or diagonally to make eights and sixteenths, biting a pattern into the birch bark to create delicate, unique patterns. Elderly women would bite bark patterns around an evening campfire as a source of family entertainment.
Scraping
If a basket maker wants to decorate the basket by the scraping method, the inner surface of the bark is moistened and darkened with water or with a wash of boiled willow bark to soften it and make it easier to scrape. A template, cut from another piece of birch bark, is laid on the piece that forms the container. The edge of the pattern is outlined with a knife so that the moistened dark layer can be removed and a lighter under-layer exposed. The design under the cut-out then stands out dark against a light background. This is known as a scraped-away or positive design and is the more usual method used. Negative designs were achieved by scraping into or through the dark bark layer, so that the design stood out lighter than the background. This method was most popular among Athapaskan groups. Some groups practiced both methods for creating designs.
The information and pictures on this page have been provided by the Northwest Territories Development Corporation. For more information on purchasing these works of art, contact Acho Dene Native Crafts at (867) 770-4161.